# TypeScript
CodeceptJS supports type declaration (opens new window) for TypeScript (opens new window). It means that you can write your tests in TS. Also, all of your custom steps can be written in TS
# Why TypeScript?
With the TypeScript writing CodeceptJS tests becomes much easier. If you configure TS properly in your project as well as your IDE, you will get the following features:
- Autocomplete (with IntelliSense) (opens new window) - a tool that streamlines your work by suggesting when you typing what function or property which exists in a class, what arguments can be passed to that method, what it returns, etc. Example:

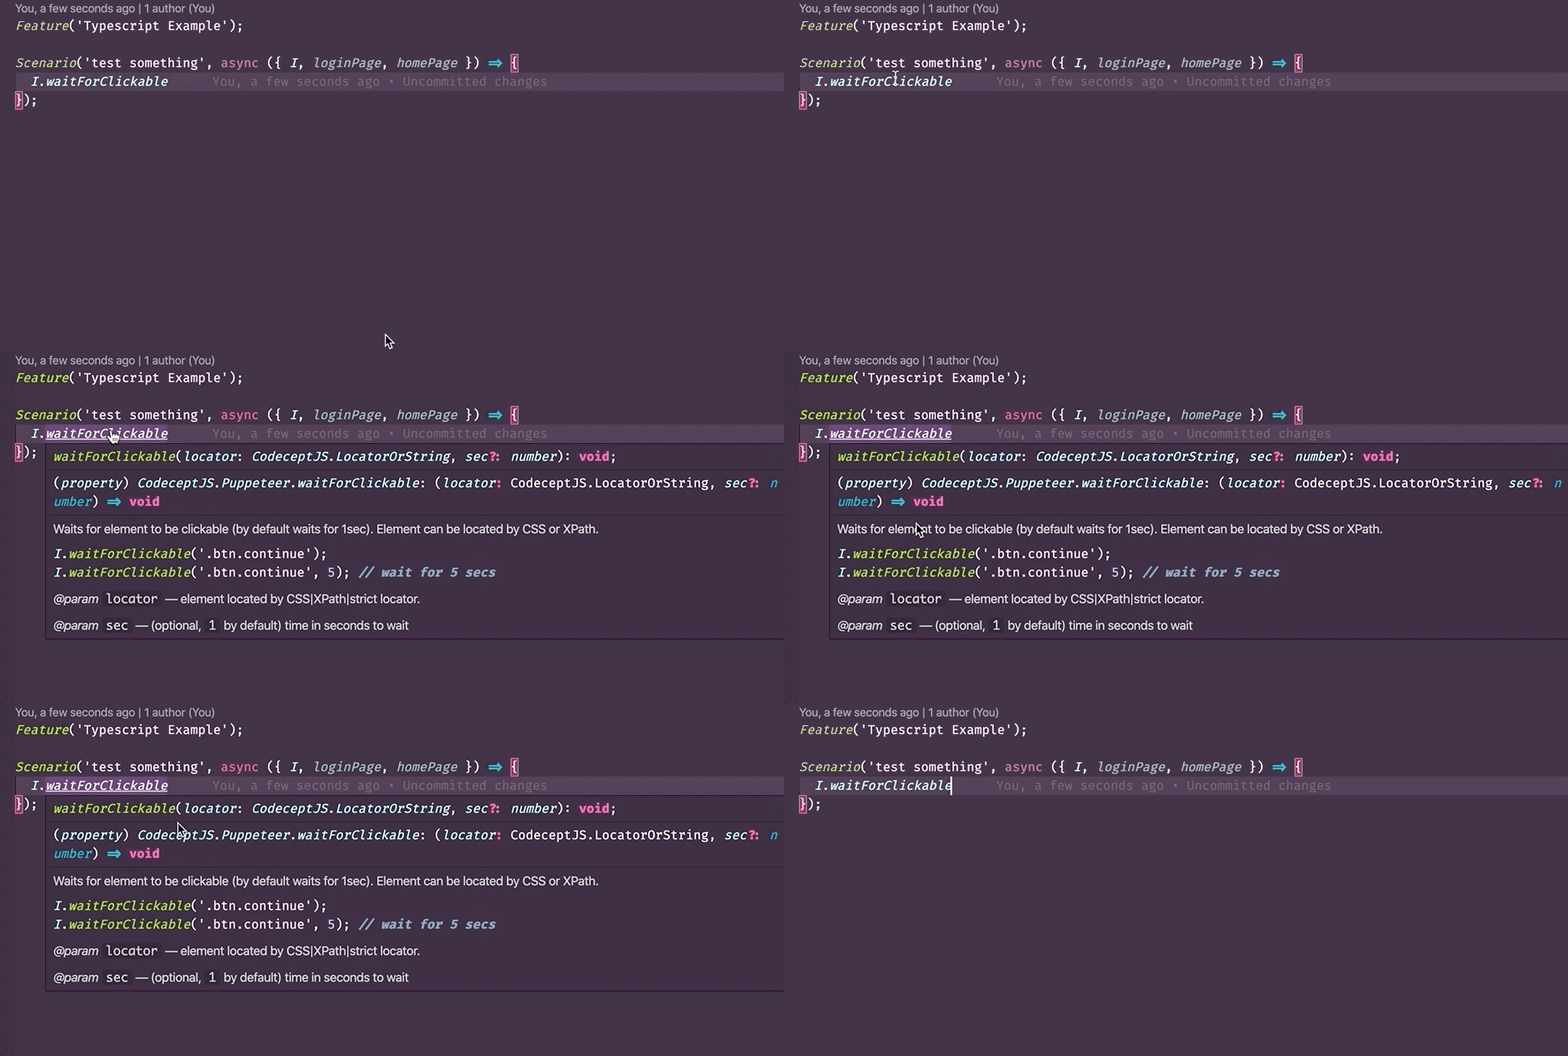
- To show additional information for a step in a test. Example:

- Checks types - thanks to TypeScript support in CodeceptJS now allow to tests your tests. TypeScript can prevent some errors:
- invalid type of variables passed to function;
- calls no-exist method from PageObject or
Iobject; - incorrectly used CodeceptJS features;
# Getting Started Since 3.3.5
CodeceptJS can initialize tests as a TypeScript project. When starting a new project with a standard installation via
npx codeceptjs init
Then select TypeScript as the first question:
? Do you plan to write tests in TypeScript? Yes
Then a config file and new tests will be created in TypeScript format.
If a config file is set in TypeScript format (codecept.conf.ts) package ts-node will be used to run tests.
# Promise-Based Typings
By default, CodeceptJS tests are written in synchronous mode. This is a regular CodeceptJS test:
I.amOnPage('/')
I.click('Login')
I.see('Hello!')
Even thought we don't see any await, those commands are executed synchronously, one by one.
All methods of I object actually return promise and TypeScript linter requires to use await operator for those promises.
To trick TypeScript and allow writing tests in CodeceptJS manner we create typings where void is returned instead of promises. This way linter won't complain on async code without await, as no promise is returned.
Our philosophy here is: use await only when it is actually needed, don't add visual mess to your code prefixing each line with await. However, you might want to get a better control of your tests and follow TypeScript conventions.
This is why you might want to enable promise-based typings.
A previous test should be rewritten with awaits:
await I.amOnPage('/')
await I.click('Login')
await I.see('Hello!')
Using await explicitly provides a beter control of execution flow. Some CodeceptJS users report that they increased stability of tests by adopting await for all CodeceptJS commands in their codebase.
If you select to use promise-based typings, type definitions will be generated so all actions to return a promise. Otherwise they will still return promises but it won't be relfected in type definitions.
To introduce promise-based typings into a current project edit codecept.conf.ts:
fullPromiseBased: true;
and rebuild type definitions with
npx codeceptjs def
# Types for custom helper or page object
If you want to get types for your custom helper (opens new window), you can add their automatically with CodeceptJS command npx codeceptjs def.
For example, if you add the new step printMessage for your custom helper like this:
// customHelper.ts
export class CustomHelper extends Helper {
  printMessage(msg: string) {
    console.log(msg)
  }
}
Then you need to add this helper to your codecept.conf.js like in this docs (opens new window).
And then run the command npx codeceptjs def.
As result our steps.d.ts file will be updated like this:
/// <reference types='codeceptjs' />
type CustomHelper = import('./CustomHelper');

declare namespace CodeceptJS {
  interface SupportObject { I: I }
  interface Methods extends Puppeteer, CustomHelper {}
  interface I extends WithTranslation<Methods> {}
  namespace Translation {
    interface Actions {}
  }
}
And now you can use autocomplete on your test.
Generation types for PageObject looks like for a custom helper, but steps.d.ts will look like:
/// <reference types='codeceptjs' />
type loginPage = typeof import('./loginPage');
type homePage = typeof import('./homePage');
type CustomHelper = import('./CustomHelper');

declare namespace CodeceptJS {
  interface SupportObject { I: I, loginPage: loginPage, homePage: homePage }
  interface Methods extends Puppeteer, CustomHelper {}
  interface I extends WithTranslation<Methods> {}
  namespace Translation {
    interface Actions {}
  }
}
# Types for custom strict locators
You can define custom strict locators (opens new window) that can be used in all methods taking a locator (parameter type LocatorOrString).
Example: A custom strict locator with a data property, which can be used like this:
I.click({ data: 'user-login' });
In order to use the custom locator in TypeScript code, its type shape needs to be registered in the interface CustomLocators in your steps.d.ts file:
/// <reference types='codeceptjs' />
...

declare namespace CodeceptJS {
  ...

  interface CustomLocators {
    data: { data: string };
  }
}
The property keys used in the CustomLocators interface do not matter (only the types of the interface properties are used). For simplicity it is recommended to use the name that is also used in your custom locator itself.
You can also define more complicated custom locators with multiple (also optional) properties:
/// <reference types='codeceptjs' />
...

declare namespace CodeceptJS {
  ...

  interface CustomLocators {
    data: { data: string, value?: number, flag?: boolean };
  }
}