# Protractor Testing with CodeceptJS
# Introduction
CodeceptJS is an acceptance testing framework. In the diversified world of JavaScript testing libraries, it aims to create a unified high-level API for end-to-end testing, powered by a variety of backends. CodeceptJS allows you to write a test and switch the execution driver via config: whether it's wedriverio, puppeteer, or protractor depends on you. This way you aren't bound to a specific implementation, and your acceptance tests will work no matter what framework is running them.
Protractor (opens new window) is an official tool for testing AngularJS applications. CodeceptJS should not be considered as alternative to Protractor, but rather a testing framework that leverages this powerful library.

There is no magic in testing of AngularJS application in CodeceptJS. You just execute regular Protractor commands, packaged into a simple, high-level API.
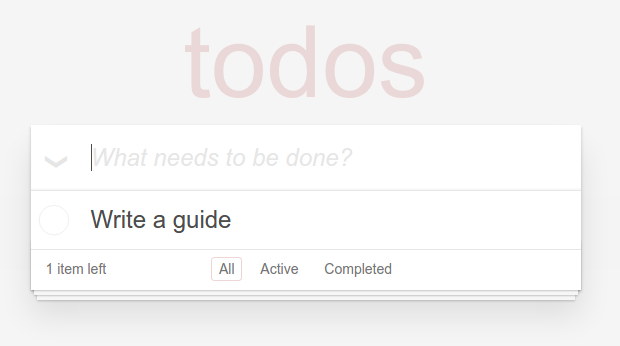
As an example, we will use the popular TodoMVC application (opens new window). How would we test creating a new todo item using CodeceptJS?
Scenario('create todo item', ({ I }) => {
  I.amOnPage('/');
  I.dontSeeElement('#todo-count');
  I.fillField({model: 'newTodo'}, 'Write a guide');
  I.pressKey('Enter');
  I.see('Write a guide', {repeater: "todo in todos"});
  I.see('1 item left', '#todo-count');
});
A similar test written using Protractor's native syntax (inherited from selenium-webdriver) would look like this:
it('should create todo item', (I) => {
  browser.get("http://todomvc.com/examples/angularjs/#/");
  expect(element(by.css("#todo-count")).isPresent()).toBeFalsy();
  var inputField = element(by.model("newTodo"));
  inputField.sendKeys("Write a guide");
  inputField.sendKeys(protractor.Key.ENTER);
  var todos = element.all(by.repeater("todo in todos"));
  expect(todos.last().getText()).toEqual("Write a guide"));
  element(by.css("#todo-count")).getText()).toContain('1 items left');
});
Compared to the API proposed by CodeceptJS, the Protractor code looks more complicated. Even more important, it's harder to read and follow the logic of the Protractor test. Readability is a crucial part of acceptance testing. Tests should be easy to modify when there are changes in the specification or design. If the test is written in Protractor, it would likely require someone familiar with Protractor to make the change, whereas CodeceptJS allows anyone to understand and modify the test. CodeceptJS provides scenario-driven approach, so a test is just a step-by-step representation of real user actions. This means you can easily read and understand the steps in a test scenario, and edit the steps when the test needs to be changed.
In this way, CodeceptJS is similar to Cucumber. If you run a test with --steps option you will see this output:
TodoMvc --
 create todo item
 • I am on page "/"
 • I dont see element "#todo-count"
 • I fill field {"model":"newTodo"}, "Write a guide"
 • I press key "Enter"
 • I see "Write a guide", {"repeater":"todo in todos"}
 • I see "1 item left", "#todo-count"
 ✓ OK in 968ms
Unlike Cucumber, CodeceptJS is not about writing test scenarios to satisfy business rules or requirements. Instead, its goal is to provide standard action steps you can use for testing applications. Although it can't cover 100% of use cases, CodeceptJS aims for 90%. For the remainder, you can write your own steps inside a custom Helper (opens new window) using Protractor's API.
# Setting up CodeceptJS with Protractor
To start using CodeceptJS you will need to install it via NPM and initialize it in a directory with tests.
npm install codeceptjs --save
npx codeceptjs init
You will be asked questions about the initial configuration, make sure you select the Protractor helper.
If your project didn't already have the Protractor library, it will be installed as part of this process.
Please agree to extend steps, and use http://todomvc.com/examples/angularjs/ as the url for Protractor helper.
For TodoMVC application, you will have following config created in the codecept.conf.js file:
exports.config = { tests: './*_test.js',
  timeout: 10000,
  output: './output',
  helpers:
   { Protractor:
      { url: 'http://todomvc.com/examples/angularjs/',
        driver: 'hosted',
        browser: 'chrome',
        rootElement: 'body' } },
  include: { I: './steps_file.js' },
  bootstrap: false,
  mocha: {},
  name: 'todoangular'
}
Your first test can be generated with the gt command:
npx codeceptjs gt
After that, you can start writing your first CodeceptJS/Angular tests.
Please refer to the Protractor helper (opens new window) documentation for a list of all available actions.
You can also run the list command to see methods of I:
npx codeceptjs list
# Starting Selenium Server
Protractor requires Selenium Server to be started and running. To start and stop Selenium automatically install @wdio/selenium-standalone-service.
npm i @wdio/selenium-standalone-service --save
Enable it in the codecept.conf.js file, inside the plugins section:
exports.config = {
  // ...
  // inside codecept.conf.js
  plugins: {
    wdio: {
        enabled: true,
        services: ['selenium-standalone']
    }
  }
}
# Testing non-Angular Applications
Protractor can also be used to test applications built without AngularJS. In this case, you need to disable the angular synchronization feature inside the config:
helpers: {
  Protractor: {
    url: "http://todomvc.com/examples/angularjs/",
    driver: "hosted",
    browser: "firefox",
    angular: false
  }
}
# Writing Your First Test
Your test scenario should always use the I object to execute commands.
This is important, as all methods of I are running in the global promise chain. This way, CodeceptJS makes sure everything is executed in right order.
To start with opening a webpage, use the amOnPage command for. Since we already specified the full URL to the TodoMVC app, we can pass the relative path for our url, instead of the absolute url:
Feature('Todo MVC');

Scenario('create todo item', ({ I }) => {
  I.amOnPage('/');
});
All scenarios should describe actions on the site, with assertions at the end. In CodeceptJS, assertion commands have the see or dontSee prefix:
Feature('Todo MVC');

Scenario('create todo item', ({ I }) => {
  I.amOnPage('/');
  I.dontSeeElement('#todo-count');
});
A test can be executed with the run command, we recommend using the --steps option to print out the step-by-step execution:
npx codeceptjs run --steps
Test root is assumed to be /home/davert/demos/todoangular
Using the selenium server at http://localhost:4444/wd/hub

TodoMvc --
 create todo item
 • I am on page "/"
 • I dont see element "#todo-count"
# Running Several Scenarios
By now, you should have a test similar to the one shown in the beginning of this guide. We probably want to have multiple tests though, like testing the editing of todo items, checking todo items, etc.
Let's prepare our test to contain multiple scenarios. All of our test scenarios will need to to start with with the main page of application open, so amOnPage can be moved into the Before hook:
Our scenarios will also probably deal with created todo items, so we can move the logic of creating a new todo into a function.
Feature('TodoMvc');

Before(({ I }) => {
  I.amOnPage('/');
});

const createTodo = function (I, name) {
  I.fillField({model: 'newTodo'}, name);
  I.pressKey('Enter');
}

Scenario('create todo item', ({ I }) => {
  I.dontSeeElement('#todo-count');
  createTodo(I, 'Write a guide');
  I.see('Write a guide', {repeater: "todo in todos"});
  I.see('1 item left', '#todo-count');
});
and now we can add even more tests!
Scenario('edit todo', ({ I }) => {
  createTodo(I, 'write a review');
  I.see('write a review', {repeater: "todo in todos"});
  I.doubleClick('write a review');
  I.pressKey(['Control', 'a']);
  I.pressKey('write old review');
  I.pressKey('Enter');
  I.see('write old review', {repeater: "todo in todos"});
});

Scenario('check todo item', ({ I }) => {
  createTodo(I, 'my new item');
  I.see('1 item left', '#todo-count');
  I.checkOption({model: 'todo.completed'});
  I.see('0 items left', '#todo-count');
});
This example is available on GitHub (opens new window).
# Locators
You may have noticed that CodeceptJS doesn't use by.* locators which are common in Protractor or Selenium Webdriver.
Instead, most methods expect you to pass valid CSS selectors or XPath. If you don't want CodeceptJS to guess the locator type, then you can specify the type using strict locators. This is the CodeceptJS version of by, so you can also reuse your angular specific locators (like models, repeaters, bindings, etc):
{css: 'button'}
{repeater: "todo in todos"}
{binding: 'latest'}
When dealing with clicks, we can specify a text value. CodeceptJS will use that value to search the web page for a valid clickable element containing our specified text. This enables us to search for links and buttons by their text.
The same is true for form fields: they can be searched by field name, label, and so on.
Using smart locators makes tests easier to write, however searching an element by text is slower than searching via CSS|XPath, and is much slower than using strict locators.
# Refactoring
In the previous examples, we moved actions into the createTodo function. Is there a more elegant way of refactoring?
Can we instead write a function like I.createTodo() which we can reuse? In fact, we can do so by editing the steps_file.js file created by the init command.
// in this file you can append custom step methods to 'I' object

module.exports = function() {
  return actor({
    createTodo: function(title) {
      this.fillField({model: 'newTodo'}, title);
      this.pressKey('Enter');
    }
  });
}
That's it, our method is now available to use as I.createTodo(title):
Scenario('create todo item', ({ I }) => {
  I.dontSeeElement('#todo-count');
  I.createTodo('Write a guide');
  I.see('Write a guide', {repeater: "todo in todos"});
  I.see('1 item left', '#todo-count');
});
To learn more about refactoring options in CodeceptJS read PageObjects guide (opens new window).
# Extending
What if CodeceptJS doesn't provide some specific Protractor functionality you need? If you don't know how to do something with CodeceptJS, you can simply revert back to using Protractor syntax!
Create a custom helper, define methods for it, and use it inside the I object. Your Helper can access browser from Protractor
by accessing the Protractor helper:
let browser = this.helpers['Protractor'].browser;
or use global element and by variables to locate elements:
element.all(by.repeater('result in memory'));
This is the recommended way to implement all custom logic using low-level Protractor syntax in order to reuse it inside of test scenarios. For more information, see an example of such a helper (opens new window).